Replacing your driveway starts with assessing its condition and choosing suitable materials. Clear the area, mark utilities, and inform neighbors. Get multiple quotes and check contractors’ credentials. First, excavate and grade the site, ensuring proper drainage. Compact the soil and add a stable base layer of crushed stone. For an asphalt driveway, pour and spread the hot mix evenly, then compact it. If it’s concrete, pour, level, and finish with a broom texture. Finally, apply a sealant and tidy up the edges. To understand each step in more depth, here’s what you need to know next.
Initial Planning
When planning a driveway replacement, begin by assessing your current driveway’s condition and identifying your goals. Look for cracks, potholes, and drainage issues that need addressing. You want your new driveway to not only be functional but also enhance the curb appeal of your home.
Think about the material you want—concrete, asphalt, pavers, or gravel—and how it fits with your home’s aesthetic and your personal style.
Next, consider the layout and design. Do you need extra space for additional vehicles or a wider turning radius? Maybe you envision a driveway that seamlessly integrates with your landscaping, creating a welcoming path to your front door. Discuss these ideas with your family, as their input can be invaluable.
Reach out to neighbors who’ve recently had their driveways replaced. Their experiences can offer insights and recommendations for contractors and materials. You’ll feel more connected to your community by engaging in these conversations and gathering first hand advice.
Budgeting and Cost Estimates
Setting a realistic budget is crucial for a successful driveway replacement. You’ll want to start by getting multiple quotes from reputable contractors in your community. This not only gives you a ballpark figure but also helps you connect with professionals who understand the local market. Don’t just go for the lowest bid; consider the contractor’s reputation, reviews, and your gut feeling.
Include a contingency fund in your budget to cover unexpected expenses. It’s common for issues like drainage problems or the need for extra excavation to arise, and having a financial cushion ensures you won’t be caught off guard.
Labor costs can significantly impact your budget. It’s essential to understand what’s included in the price, such as permits, removal of the old driveway, and site preparation. Be sure to ask about these details to avoid hidden costs later on.
Lastly, consider additional features you might want, like decorative edges or heated driveways. These can add to the cost but also increase the value and enjoyment of your new driveway. By carefully planning and considering all aspects, you’ll feel more confident and connected to your project, ensuring a smooth and successful driveway replacement.
Choosing Materials
Choosing the right materials for your driveway replacement can make a significant difference in both aesthetics and functionality.
First, consider the climate in your area. Asphalt is a solid choice for colder climates as it withstands freezing and thawing cycles well. On the other hand, concrete is a durable, low-maintenance option that suits warmer climates better.
Next, think about the look you want to achieve. Concrete offers versatility with finishes like stamping, coloring, and staining, allowing you to match your driveway to your home’s style. If you prefer a more natural appearance, gravel might be the way to go. It’s affordable and provides excellent drainage, though it requires more maintenance.
Ease of installation and longevity are crucial too. Pavers, for instance, offer a unique and customizable look, and individual bricks can be replaced if damaged. However, they can be more labor-intensive to install. Recycled materials, such as crushed concrete or rubber, are eco-friendly alternatives that can give your driveway a modern touch while also supporting sustainability.
Hiring Professionals
Hiring the right professionals for your driveway replacement can make or break the project. You’ll want to find contractors who aren’t only skilled but also understand your vision. Start by asking friends and neighbors for recommendations. Word of mouth can be incredibly reassuring, making you feel part of a community that looks out for each other.
When you’ve got a list of potential candidates, check their credentials. Ensure they’re licensed and insured. This isn’t just about legality; it’s about peace of mind. A licensed professional is likely to follow industry standards, reducing the risk of any issues down the line.
Next, get multiple quotes. Don’t settle for the first estimate you receive. This process will give you a better understanding of the going rates and help you avoid being overcharged.
During consultations, ask questions about their experience with similar projects. Their answers will reveal their expertise and how well they can meet your needs.
Preparing the Site
Before any work can begin on your driveway replacement, site preparation is crucial. You’ll want to clear the area of any obstacles like vehicles, planters, or outdoor furniture. This step ensures the professionals have a clean slate to work with, reducing the risk of damage to your belongings.
Next, it’s important to mark any underground utilities. Contact your local utility companies to identify and mark these lines. This precaution prevents accidental damage and ensures everyone’s safety.
Your contractor will likely assess the soil conditions as well. Good drainage is essential for a long-lasting driveway, so they may need to grade the area to ensure water flows away from your home. If the soil is too soft or unstable, additional steps like soil stabilization might be necessary.
Don’t forget to inform your neighbors about the upcoming work. Sharing your plans fosters a sense of community and keeps everyone in the loop about potential noise or disruptions.
Removal of Old Driveway
The removal of the old driveway is a critical step in the replacement process. You’ll see the crew arrive with heavy machinery like excavators and jackhammers. It’s quite a sight, and it may even draw the attention of your neighbors. Watching the old surface break apart can be surprisingly satisfying, knowing you’re one step closer to a brand-new driveway.
First, they’ll start by breaking up the old concrete or asphalt into manageable pieces. This involves loud, powerful tools, so brace yourself for some noise.
The broken pieces are then hauled away, leaving a clear area for the next steps. It’s impressive how quickly this can be done; professionals make it look easy.
As the old driveway disappears, you might feel a mix of excitement and anticipation. This is where your community comes in. Don’t hesitate to chat with neighbors who are curious about your project. Sharing your experience can make you feel more connected, and you might even inspire others to upgrade their driveways too.
Ground Preparation
Now that the old driveway is gone, you’ll start with ground preparation by clearing the area of debris.
Then, excavation and grading will ensure the surface is level and ready.
Clearing the Area
How exactly do you prepare the ground for a driveway replacement?
First, you’ll need to clear the area thoroughly. Begin by removing any vehicles, tools, or personal items from the driveway. You want a completely open space to work with.
Next, focus on eliminating any vegetation. You should pull out weeds, grass, and any other plants that might be encroaching on the area. Use a weed killer if necessary, but make sure it’s safe for the environment.
Once you’ve tackled the greenery, it’s time to deal with any debris. Clear away rocks, sticks, and any other loose materials. It’s crucial to have a clean slate before moving forward. If there are any obstacles such as old mailboxes or decorative items, make sure to temporarily relocate them.
Don’t forget to mark any underground utilities before digging begins. Contact your local utility companies to ensure you know where all lines are located. This step is vital for your safety and the safety of others.
Excavation and Grading
After you’ve cleared the area, it’s crucial to start the excavation and grading process. This step ensures your new driveway will have a solid foundation and proper drainage. Begin by marking the boundaries of your new driveway with stakes and string. This helps maintain a clear perimeter and guides your excavation.
Next, use a shovel or, for larger projects, rent a mini-excavator to remove the top layer of soil, typically about 8 to 12 inches deep. Remember, you’re not just digging a hole; you’re setting the stage for a driveway that will last for years. Aim to create a smooth, even surface, free of large rocks and debris.
Once you’ve excavated the area, it’s time for grading. Grading involves shaping the ground to ensure water flows away from your home, preventing potential flooding or water damage. Use a rake and a level to create a gentle slope, ideally sloping away from structures at a rate of about one inch per foot.
Taking the time to properly excavate and grade your driveway space fosters a sense of accomplishment and belonging in a community that values quality craftsmanship and attention to detail.
Soil Compaction
Soil compaction is a crucial step to ensure your driveway remains stable and long-lasting. When the excavation and grading are complete, it’s time to focus on compacting the soil. This process involves using heavy machinery like a plate compactor or a roller to press down the soil, making it denser and eliminating air pockets. Properly compacted soil provides a solid foundation, preventing future issues like settling or cracking.
You might be wondering why this step matters so much. Well, compacted soil distributes the weight of your car evenly, reducing the chances of ruts and dips forming over time. It’s all about creating a driveway that stands the test of time, giving you peace of mind.
As you watch the crew work, you’ll notice they make several passes over the area, ensuring every inch is thoroughly compacted. It’s a meticulous process, but it’s worth it.
Laying the Base
Typically, laying the base is a critical step in ensuring your new driveway stands the test of time. You want to start by spreading a layer of crushed stone or gravel over the compacted soil. This base layer acts as a solid foundation for your driveway, providing stability and aiding in proper drainage. It’s crucial to get this right to prevent future issues like cracking or sinking.
Once the crushed stone or gravel is in place, you’ll need to evenly distribute it across the area. Use a rake to spread the material, making sure it’s level. This step helps to create a uniform surface, which is essential for the durability of your driveway. Don’t rush this process; taking your time now will pay off in the long run.
After spreading the base material, you should compact it thoroughly. Use a plate compactor to press the gravel down, ensuring it’s tightly packed. This step minimizes any gaps or air pockets that could lead to instability.
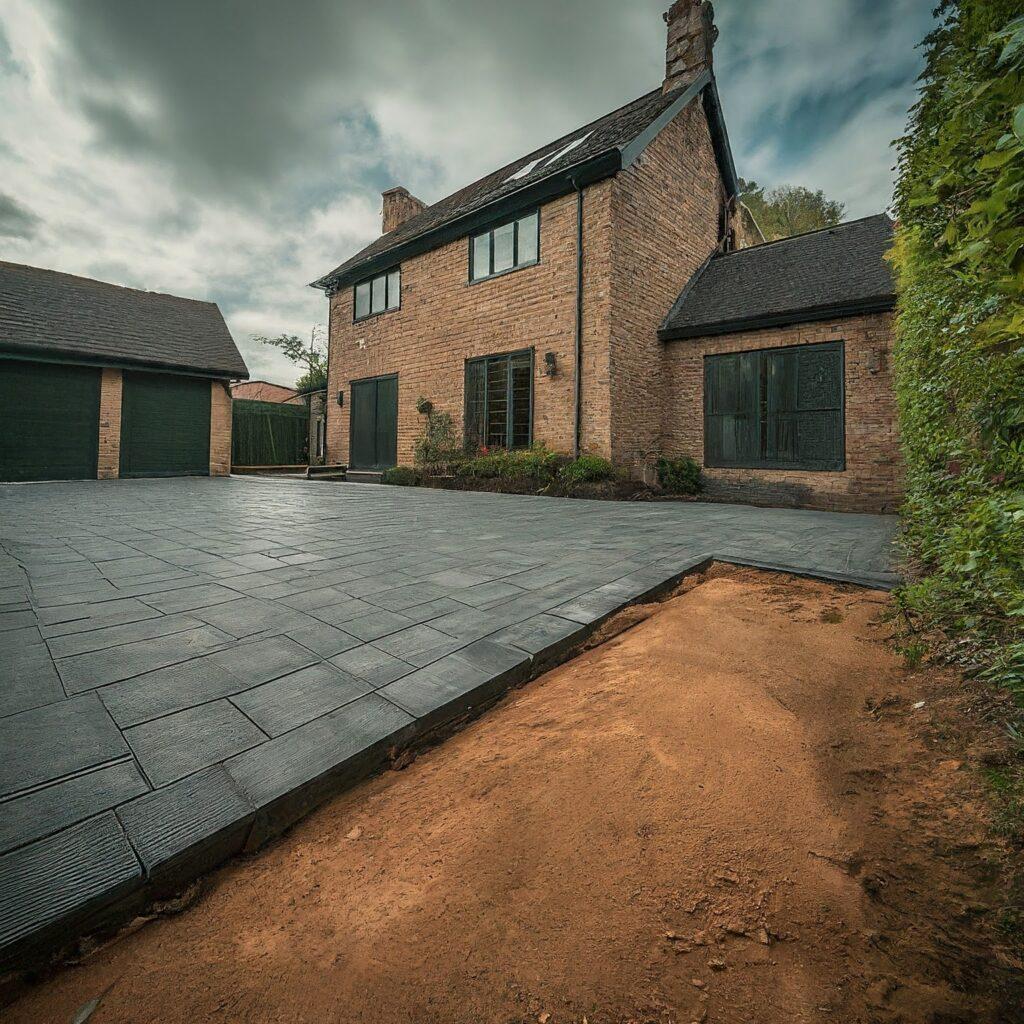
Installing the New Driveway
With the base layer thoroughly compacted, you’re ready to install the new driveway. Depending on your chosen material, this step varies slightly.
For asphalt, a fresh layer of hot mix is poured and spread evenly. Make sure it’s applied in consistent thickness to prevent weak spots.
For concrete, the mixture is poured into the prepared area, then leveled and smoothed out with a trowel.
The process requires patience and attention to detail. Asphalt needs to be compacted immediately after spreading to ensure a sturdy finish. Rollers are used to press the material down, creating a strong bond with the base layer.
For concrete, you’ll need to wait until the surface starts to set before applying a broom finish for texture, ensuring traction.
Throughout the installation, it’s crucial to keep an eye on the weather. Rain can ruin both asphalt and concrete applications, so plan accordingly. Also, make sure to rope off the area to prevent anyone from stepping on your new driveway prematurely.
This step won’t just keep the project on track but also foster a sense of community as neighbors see your progress and share in your transformation journey.
Final Touches
The final touches are what truly bring your new driveway to life. It’s the moment where your investment starts to show its real value.
First, the contractors will ensure that the surface is perfectly smooth. They’ll use specialized tools to remove any minor imperfections, making sure your driveway is both functional and visually appealing.
Next, they’ll apply a sealant to protect your driveway from weather damage and stains. This step is crucial for longevity. You’ll notice a slight shine, giving it that polished, finished look. Remember, a well-sealed driveway can last years longer, saving you money and hassle in the long run.
After sealing, it’s time to address the edges. Contractors will tidy up the borders, ensuring they blend seamlessly with your lawn or garden. This attention to detail makes your driveway look professionally done and harmonizes with your home’s overall aesthetic.
Lastly, you’ll get a final walkthrough. The contractor will explain maintenance tips and answer any questions. You’re not just getting a driveway; you’re joining a community of homeowners who take pride in their property. With these final touches, your driveway isn’t just complete; it’s a statement of care and quality.
Frequently Asked Questions
How Long Should I Wait Before Using My New Driveway?
You should wait about 24 to 48 hours before walking on your new driveway and at least a week before driving on it. Giving it time to cure ensures it lasts longer and stays pristine.
Can I Customize the Design of My New Driveway?
Absolutely, you can customize your new driveway! Choose patterns, colors, and finishes that reflect your style and enhance your curb appeal. Your driveway should be an extension of your home, making it uniquely yours.
Are There Eco-Friendly Options for Driveway Materials?
Yes, you can choose eco-friendly driveway materials. Options like permeable pavers, recycled asphalt, and grass pavers help you reduce your environmental impact while creating a welcoming space. You’ll feel good knowing you’re making a sustainable choice.
What Maintenance Is Required After Installation?
After installation, you’ll need to regularly clean your driveway, fill any cracks promptly, and seal it every few years. This routine keeps it looking great and strengthens your community’s curb appeal. Together, you’ll maintain a welcoming neighborhood.
Will the New Driveway Be Affected by Extreme Weather Conditions?
Yes, your new driveway can be affected by extreme weather. To protect it, you’ll need to seal it regularly and clear snow promptly. This way, you’ll ensure it remains durable and looks great for years.
Now that you know what to expect during a driveway replacement, you’re ready to tackle the project with confidence. By planning ahead, budgeting wisely, choosing the right materials, and hiring skilled professionals, you’ll ensure a smooth process. Proper site preparation and careful installation will result in a durable, attractive driveway. Remember, the final touches make all the difference, so don’t rush them. Enjoy your new driveway and the improved curb appeal it brings!