A well-maintained driveway is crucial for the overall appearance and functionality of your home. Over time, even the most durable concrete driveways can show signs of wear and tear. Concrete driveway resurfacing is an effective way to rejuvenate your driveway, making it look new again while extending its lifespan. This comprehensive guide will walk you through the entire resurfacing process, ensuring you have all the information needed for a successful project.
Signs That Your Driveway Needs Resurfacing
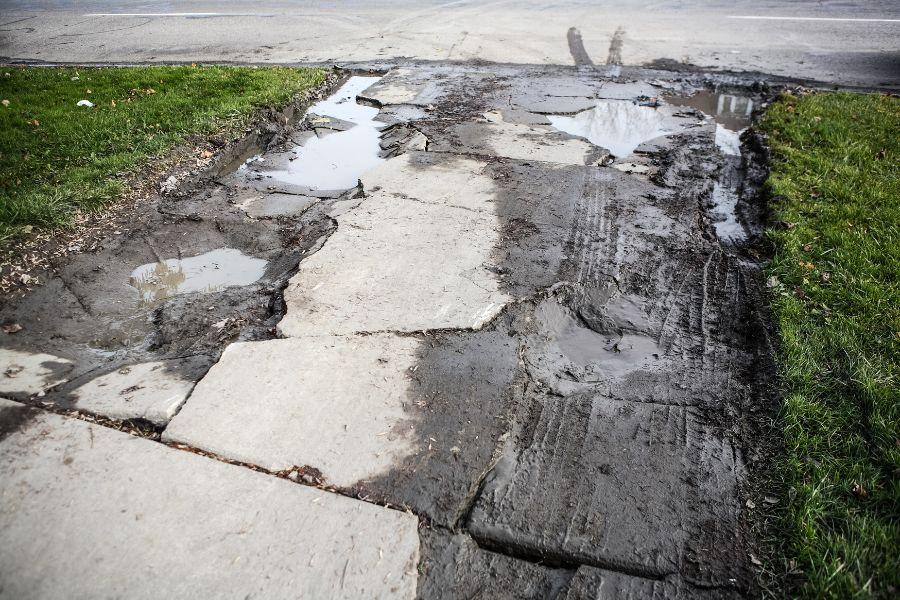
Visible Cracks and Potholes
Cracks and potholes are clear indicators that your driveway may need resurfacing. These imperfections not only detract from the driveway’s appearance but can also pose safety hazards. Over time, small cracks can expand, leading to larger structural issues.
Discoloration and Stains
Over years of use, concrete driveways can become discolored or stained from various substances like oil, chemicals, and weather exposure. These stains can be unsightly and challenging to remove, making resurfacing a viable solution.
Surface Erosion
Erosion of the concrete surface can occur due to weathering and constant use. This erosion can lead to a rough and uneven texture, which not only looks unattractive but can also degrade the driveway’s structural integrity.
Uneven Surface
An uneven driveway surface can result from poor initial installation or the settling of the ground beneath the concrete. Resurfacing can help level out the surface, providing a smooth and safe driveway.
Benefits of Resurfacing Your Driveway
Enhanced Aesthetic Appeal
Resurfacing your driveway dramatically improves its appearance. With modern resurfacing techniques, you can choose from various colors, textures, and patterns to match your home’s exterior, creating a visually appealing entrance.
Improved Durability
A freshly resurfaced driveway is more resistant to future wear and tear. The new surface layer can withstand harsh weather conditions, heavy traffic, and chemical spills, ensuring longevity.
Cost-Effective Solution
Compared to complete driveway replacement, resurfacing is a more cost-effective option. It requires fewer materials, less labor, and less time, making it an economical choice for homeowners.
Increased Property Value
A well-maintained driveway boosts your home’s curb appeal, which can increase its market value. Potential buyers are often impressed by a beautiful and functional driveway, making resurfacing a worthwhile investment.
Resurfacing vs. Replacement
When to Choose Resurfacing
Resurfacing is ideal when the driveway has superficial damage like minor cracks, stains, and surface erosion. It’s also a good option when you want to enhance the appearance without the cost of full replacement.
When Replacement is Necessary
Complete replacement is necessary when the driveway has severe structural damage, deep cracks, or significant sinking. If the base of the driveway is compromised, resurfacing alone will not be sufficient.
Cost Comparison
Resurfacing is generally less expensive than replacement. The cost savings come from using fewer materials and less labor. However, if the underlying structure is damaged, replacement might be more cost-effective in the long run due to the avoidance of repeated repairs.
Types of Resurfacing Materials
Polymer Overlays
Polymer overlays are a popular choice for resurfacing due to their durability and flexibility. They can be customized with different colors and textures, providing a high-quality finish.
Concrete Resurfacer
Concrete resurfacers are specifically formulated to restore old concrete surfaces. They bond well to existing concrete, providing a durable new layer that can hide imperfections and add strength.
Microtoppings
Microtoppings are thin layers of cementitious material applied over the existing concrete. They are excellent for achieving a smooth, decorative finish and can be tinted or stained for various effects.
Decorative Options
Decorative resurfacing materials include stamped concrete overlays, colored concrete, and textured finishes. These options allow you to create a unique and attractive driveway that stands out.
Preparing for Resurfacing
Assessing the Existing Surface
Before resurfacing, assess the current condition of your driveway. Identify cracks, potholes, stains, and any structural issues. This assessment will help determine the extent of preparation needed.
Cleaning the Driveway
Thoroughly clean the driveway to remove dirt, debris, oil stains, and any other contaminants. A pressure washer is often effective for this purpose, ensuring a clean surface for the new layer to adhere to.
Repairing Cracks and Holes
Fill any cracks and holes with a suitable concrete repair product. Ensure these repairs are smooth and level with the rest of the driveway to prevent them from showing through the new surface.
Ensuring Proper Drainage
Check the driveway’s drainage to ensure water will not pool on the surface after resurfacing. Proper drainage is essential to prevent future water damage and prolong the life of the resurfaced driveway.
Tools and Materials Needed
Essential Tools
Gather essential tools such as a pressure washer, trowels, mixing buckets, a concrete mixer, squeegees, and safety gear. Having the right tools on hand will make the resurfacing process more efficient.
Required Materials
Materials needed include the chosen resurfacing compound, concrete repair products, bonding agents, sealers, and decorative elements if desired. Ensure all materials are high quality for the best results.
Safety Equipment
Wear appropriate safety equipment, including gloves, safety glasses, and a respirator, especially when handling chemicals and using power tools. Safety should always be a top priority.
Step-by-Step Resurfacing Process
Cleaning and Prepping the Surface
Start by cleaning the driveway thoroughly. Use a pressure washer to remove all debris, oil, and dirt. After cleaning, let the surface dry completely before proceeding.
Mixing the Resurfacing Material
Follow the manufacturer’s instructions to mix the resurfacing material. Ensure the mix is smooth and lump-free for a consistent application.
Applying the Resurfacer
Pour the mixed resurfacer onto the driveway, starting at one end and working your way across. Use a squeegee or trowel to spread the material evenly, filling in all cracks and holes.
Finishing Touches
Smooth the surface with a trowel for a uniform finish. If adding decorative elements, apply them while the resurfacer is still wet. Ensure all edges and corners are well-covered and smooth.
Decorative Resurfacing Techniques
Stamped Concrete Overlays
Stamped overlays mimic the appearance of natural stone, brick, or tile. Press patterns into the wet resurfacer using stamping tools to achieve this look.
Staining and Coloring
Apply stains or colorants to the resurfaced driveway to achieve the desired hue. These can be mixed into the resurfacer or applied to the surface after it has set.
Engraving and Scoring
Engraving or scoring the resurfaced driveway can create intricate designs and patterns. Use specialized tools to carve these designs into the surface for a unique finish.
Adding Textures
Add textures to the resurfaced driveway using brushes, rollers, or stamps. Textured finishes can enhance traction and add visual interest to the driveway.
Curing and Sealing the Resurfaced Driveway
Importance of Proper Curing
Curing is critical for achieving the full strength of the resurfaced driveway. It involves maintaining the right moisture levels to ensure the concrete sets correctly.
Different Curing Methods
Methods for curing include covering the surface with plastic sheeting, using curing compounds, or regularly misting the surface with water. Choose the method that best suits your climate and conditions.
Sealing for Longevity
Once the resurfaced driveway has cured, apply a high-quality sealer. Sealing protects the surface from stains, water damage, and UV rays, extending the driveway’s lifespan.
Maintenance Tips for a Resurfaced Driveway
Regular Cleaning
Keep the driveway clean by sweeping away debris and using a hose or pressure washer for deeper cleaning. Regular maintenance helps prevent stains and buildup.
Periodic Sealing
Reapply sealer every few years to maintain the driveway’s protective layer. This ensures the surface remains resistant to weathering and stains.
Addressing Minor Repairs
Promptly repair any minor cracks or damage that appear. Early intervention prevents small issues from becoming larger problems, preserving the integrity of the driveway.
Common Mistakes to Avoid
Inadequate Surface Preparation
Failing to properly clean and prepare the surface can lead to poor adhesion of the resurfacing material. Always ensure the driveway is thoroughly cleaned and repaired before resurfacing.
Incorrect Mixing Ratios
Mixing the resurfacer incorrectly can compromise its strength and durability. Follow the manufacturer’s instructions precisely for the best results.
Ignoring Weather Conditions
Resurfacing should not be done in extreme weather conditions. Avoid very hot, cold, or wet weather, as these conditions can affect the curing process and final finish.
Skipping Curing Steps
Proper curing is essential for the longevity of the resurfaced driveway. Do not rush this process or skip steps, as it can lead to weak spots and early deterioration.
DIY vs. Professional Resurfacing
Pros and Cons of DIY
DIY resurfacing can save money and provide a sense of accomplishment. However, it requires time, effort, and some level of skill to achieve professional results.
Benefits of Hiring Professionals
Professional resurfacing ensures high-quality results with minimal hassle. Professionals have the expertise and equipment to handle complex tasks and achieve a durable, attractive finish.
Cost Considerations
Consider the costs of materials, tools, and your time when deciding between DIY and professional resurfacing. Investing in professional services can save money in the long term by avoiding potential mistakes.
Environmental Impact
Eco-Friendly Resurfacing Materials
Choose eco-friendly resurfacing materials that reduce environmental impact. Many products are available that are made from recycled materials and have low VOC emissions.
Reducing Waste Through Resurfacing
Resurfacing rather than replacing reduces waste by reusing the existing concrete base. This sustainable practice minimizes the environmental footprint of your driveway project.
Sustainable Practices
Adopt sustainable practices such as recycling old materials and using water-saving techniques. These practices contribute to a more environmentally friendly driveway resurfacing project.
Key Takeaways
- Visible Cracks and Potholes: Resurfacing addresses superficial damage like minor cracks and potholes, enhancing safety and aesthetics.
- Discoloration and Stains: Resurfacing can eliminate unsightly discoloration and stains, restoring the driveway’s appearance.
- Surface Erosion: Erosion from weather and use can be repaired through resurfacing, providing a smooth and even surface.
- Enhanced Aesthetic Appeal: Resurfacing offers various design options, including colors, textures, and patterns, to improve curb appeal.
- Improved Durability: A new surface layer increases resistance to weather, traffic, and chemicals, extending the driveway’s lifespan.
- Cost-Effective Solution: Resurfacing is less expensive than replacement, requiring fewer materials and less labor.
- Increased Property Value: A well-maintained and attractive driveway can boost your home’s market value.
- Surface vs. Subsurface Drainage: Proper drainage solutions, including grading, sloping, French drains, and dry wells, prevent water damage.
- Preparation is Key: Thoroughly assess, clean, and repair the existing surface before resurfacing to ensure optimal adhesion and results.
- Proper Tools and Materials: Using the right tools, materials, and safety equipment is crucial for a successful resurfacing project.
- Step-by-Step Process: Follow detailed steps for cleaning, mixing, applying, and finishing the resurfacer to achieve a professional look.
- Decorative Techniques: Enhance your driveway with stamped overlays, staining, engraving, and textured finishes.
- Curing and Sealing: Proper curing and sealing are essential for the longevity and protection of the resurfaced driveway.
- Regular Maintenance: Keep the driveway clean, reseal periodically, and address minor repairs promptly to maintain its condition.
- Avoid Common Mistakes: Ensure adequate surface preparation, correct mixing ratios, and appropriate weather conditions to avoid issues.
- DIY vs. Professional: Consider the pros and cons of DIY resurfacing versus hiring professionals for optimal results.
- Environmental Impact: Use eco-friendly materials and practices to minimize environmental footprint and promote sustainability.a
Investing in concrete driveway resurfacing is a cost-effective way to enhance your property’s curb appeal, functionality, and longevity. By following these key takeaways and maintaining your resurfaced driveway, you can enjoy a beautiful and durable driveway for many years.